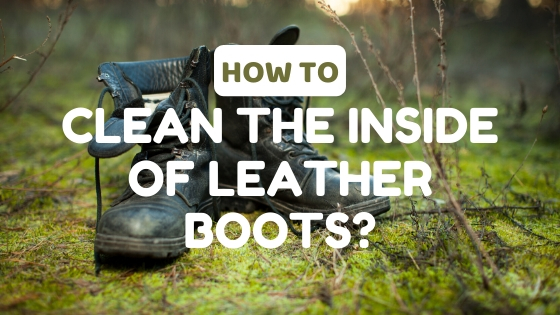
Let’s talk about cleaning the most amazing boots ever worn by each and every individual out there ! Yes we are taking about the leather boots that can be worn on any kind of indoor or outdoor occasion . Personality of a person is not only determined by how well they dress up but also how clean their boots are. Hence wear your leather boots with confidence now as we will guide you to a proper boot cleaning recipe. Realizing that leather boots can easily be cleaned from outside, how about we focus upon cleaning the leather boots from inside.
It is very important to clean your boots from inside as it kills the germs which causes foot diseases such as foot fungus and shoe contact dermatitis. Shoe contact dermatitis can be characterized as skin indications on the feet brought about by the wearing of boots. This regularly happens on the grounds that the skin on the feet responds to specific substances (allergens) found in footwear. When it comes to the inside of the leather boots they should be cleaned once in two months so that germs are washed away from inside which are caused by the sweating of the feet inside the boots.
Now the following steps will give you a proper guide for how to clean your leather boots from inside at home . These steps can easily be attempted at home and when followed correctly one can clean their leather boots from inside in a perfect manner at a very low cost.

1. Expel the Bands (Laces)
The first step to clean the leather boots from inside is to remove the laces so that we can easily open the boot. On the off chance that they’re messy, add them to a group of clothing. It’s additionally simple and economical to supplant boot bands.

2. Evacuate Hard Mud and Soil
The second step is to brush away free debris, mud, dirt and jetsam with a delicate fabric or firm brush. Because if we don’t remove it, it will automatically reach inside the boot when we try to clean the inside with soap and water.

3. Apply Water and Cleanser
The third step is to mix up a reaction of warm water and dish cleanser in a little bowl. Plunge a delicate material into it, wring it out, and wipe down the outside surfaces of the boot so it kills the germs and removes the dirt. So when we clean the inside the dirt don’t enter inside the shoe.

4. Shower Down the Inside
Now in the fourth step we shower down the inside of our leather boots, if the internal parts of your leather boots are rotten and grimy, evacuate the insoles and flush them out. Utilize this opportunity to shower the sudsy water off the outside of the boots also.

5. Dry the Boots
Step five is to remove, however, much water as could be expected with an old towel. At that point, permit the boots to dry gradually. Do this away from direct warmth and sun to keep the leather from blurring or splitting. This may take as long as 48 hours.

6. Warm the Boots Marginally
Step six is to set up the boots for molding, warm them a little in direct daylight or with a hairdryer. The boots ought to stay agreeable to contact. (No warming is vital in the event that you use boot oil.)

7. Condition the Leather
We condition our leather boots in step seven because it is important for our boots to be clean from outside also to prevent inside damage. This shields your footwear from stains and makes them sparkle. Apply boot oil, sealant, wax, or cowhide conditioner, following the bearings on the bundling for direction. Permit the leather to sit for 15 minutes. At that point, buff the boots utilizing a perfect cloth until they sparkle. Lastly, if you’re on the lookout for the most suitable conditioning oil for your boots, don’t forget to check out our in-depth review of our five favourite boot oils here.

8. Expel Stains from Leather Boots
There’s in no way like a stain to ruin the presence of your costly boots so in step 8, remove the stains because they also allow germs to go inside the boot to hurt the feet . The warm, sudsy water you utilized when cleaning your boots ought to have evacuated water stains. On the off chance that different flaws remain, re-establish your boots to like-new condition with these following stain-expelling tips:
• Oil or Oil Stains
Sprinkle the spot with preparing pop or cornstarch. Focus on the powder tenderly with a clammy cloth. Let it sit medium-term, and afterward forget about the buildup with a dry fabric.
• Ink Stains
Wet a cotton swab with scouring liquor or nail clean remover and blotch the stain. Abstain from scouring to forestall spreading the ink. Keep blotching until the stain vanishes. At that point, wipe with a soggy material and dry with a towel.
• Scrape Marks
Apply a glob of non-gel toothpaste to the scrape and rub with a delicate fabric. Wipe away the toothpaste with a soggy material and dry with a towel.
Conclusion
Hence after reading the above steps, you can easily clean your leather boots from inside and outside and can make them internally germ free, externally shiny sparkly and beautiful. Always clean your boots at whatever point they get messy and permit them to dry completely before wearing your boots once more. At regular intervals, contingent upon how frequently you utilize the boots, give them a profound clean at that point recondition and waterproof the cowhide.
With a couple of moments of care, you can expand the life expectancy of your boots from under a year to quite a long while, which would save your cost of buying new leather boots occasionally because when you will follow the above steps your leather boots will look brand new and would be ready to be worn on any occasion. Treat them well, and you’ll have healthy feet!